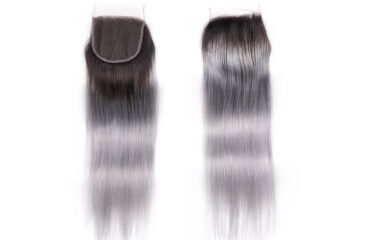
How to Put in Clip in Extensions for Black Hair

Clip-in hair extensions are a fantastic way to add length, volume, and versatility to black hair without the commitment of permanent extensions or chemical treatments. Whether you want to enhance your natural look or experiment with something new, clip-ins are a quick and damage-free solution. This guide will walk you through the steps of installing clip-in extensions for black hair, ensuring a seamless and natural finish.
1. Prepare Your Hair
Before applying clip-in extensions, it’s important to prepare your natural hair to ensure that the extensions blend well. Start by washing and conditioning your hair to create a clean base. Detangle your hair thoroughly using a wide-tooth comb, and ensure that it’s dry before starting the installation process.
If your hair is naturally curly or kinky, consider stretching it beforehand using heatless methods like twisting or braiding, or you can blow-dry it on a low heat setting. This step is optional but can make blending easier, depending on the texture of the extensions you’re using.
2. Select Quality Extensions
Choosing the right extensions is key to achieving a natural look. For black hair, extensions with textures like Afro kinky, curly, coily, or straightened options are ideal. SISHAIR clip-in extensions are a great choice as they offer a variety of textures that blend seamlessly with different hair types.
Make sure to select extensions that closely match your hair color and texture for the most realistic appearance. If you’re unsure, you can always dye or customize SISHAIR extensions to achieve the perfect match.
3. Gather Your Tools
To install clip-in extensions, you’ll need the following tools:
| Tool | Purpose |
|---|---|
| Rat-tail comb | For creating clean sections and parting hair |
| Hair clips | To secure hair sections while you work |
| Clip-in extensions | To add length and volume |
| Mirror | To monitor your progress |
Having these tools ready before you start will make the process much smoother.
4. Section Your Hair
Start by parting your hair horizontally at the nape of your neck using the rat-tail comb. Clip the top section of your hair out of the way to expose the parting. This is where you’ll attach your first row of clip-in extensions.
If your hair is thick, you may want to cornrow or twist the base to create a flatter surface for the extensions to sit on. This will help the clip-ins lie flush against your scalp and reduce bulkiness.
5. Attach the Extensions
Take a weft of clip-in extensions and open the clips. Position the weft along the parting you’ve created. Starting in the middle, snap the clip closed, then move to the sides and secure the remaining clips.
It’s important to avoid attaching the clips too close to your scalp, as this can cause discomfort. Instead, position them just below the roots for a secure but comfortable hold.
6. Blend the Extensions
After attaching the first row, unclip the next section of your hair and create another horizontal parting about an inch above the first. Repeat the process of attaching clip-in extensions and snapping them into place.
Continue working your way up your head in this manner until all the clip-ins have been installed. To create a natural look, use smaller wefts around the crown and sides of your head.
If you’re working with curly or kinky textures, use your fingers or a wide-tooth comb to gently blend your natural hair with the extensions. You can also twist or braid small sections of your hair with the extensions to create a seamless transition.
7. Style as Desired
Once all the clip-ins are installed, style your hair as desired. You can curl, straighten, or braid the extensions if they are made from heat-friendly human hair, like SISHAIR extensions. Avoid excessive heat on synthetic extensions, as this can damage them.
For black hair, protective styles like buns, half-up half-down looks, or even a full afro puff can beautifully showcase the extensions while keeping your natural hair safe.
8. Secure the Extensions
To ensure your clip-ins stay in place all day, double-check that all the clips are securely fastened. You can also lightly tease your roots where the clips are attached to provide extra grip.
If you’re wearing your extensions for an extended period, be mindful not to tug on them or apply too much tension, as this can strain your scalp and natural hair.
9. Care for Your Extensions
Proper maintenance will extend the life of your clip-in extensions. After removing them, gently detangle the wefts with a wide-tooth comb and store them in a protective bag or box. For human hair extensions like SISHAIR, wash them with sulfate-free shampoo and conditioner every few weeks to keep them soft and manageable.
10. Remove the Extensions Safely
To avoid damaging your natural hair, always remove your extensions gently. Start by unsnapping the clips and carefully sliding the extensions out. Avoid pulling or yanking, as this can cause breakage.
Once the extensions are out, detangle your natural hair and apply a lightweight oil or moisturizer to keep it hydrated.
Conclusion
Clip-in extensions are a convenient and versatile option for enhancing black hair, offering endless styling possibilities without the commitment or damage of permanent options. By following these steps and using quality products like SISHAIR extensions, you can achieve a flawless and natural look. With proper care and installation, clip-ins can become a go-to solution for elevating your style effortlessly.